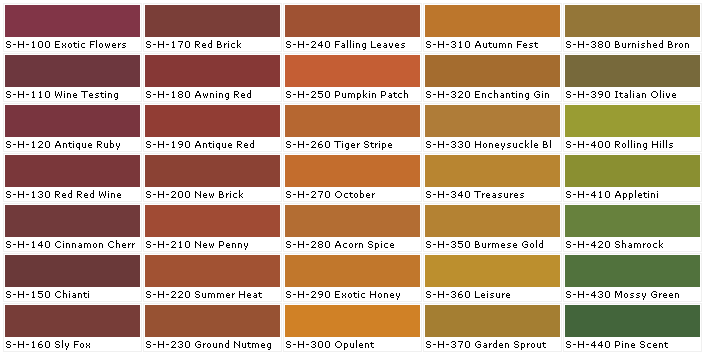
I've also decided to paint the retrofab chair. I was initially hoping to go with a RL color, but couldn't find what I was imagining. I ended finding up my match with Behr "Leisure." Yup, I'll be sittin' in my retrofab chair gettin' my leisure on. Perhaps wearing a leisure suit??

Oh crappers. You can't see the leisure. It's basically a yummy dijon color.
Anyhoo, back to the pillow talk. I was at Michael's crafts a while back and one of the books on their shelf caught my eye; a pillow making book. Fun! I flipped through the pages and suddenly, love. Why don't I just share the result of my book lovin'.

I apologize for the crappy lighting. I made two like the one in the back too.
The dumb flash makes the details of my fishy-like pillow disappear. No bueno! The fabric is this luxurious velvety thing that has a bubble design in the fabric grain. LOVE! The brown one in the back is a lovely linen. Yeah, so count this...1 yellow fishy pillow + 2 brown lovely linen pillows + 1 more striped pillow to create symmetry = lots of sewing, cutting, measuring, and 4 fab pillows!

ooohhh, ahhh.
Here's the so-so how too. My initial plan was to photo every step, but that wasn't very successful because I always end up getting way too into the whole process and forget to actually take pics. Oh well. Here's what I got. Take it or leave it.
Step one: Select a fabric that won't fray when cut with scissors and not sewn. Suede and this velvety one do the trick.
Step two: Create an outline pattern on the back part of your fabric using a pencil or fabric pencil. I used a carpet cleaner spray bottle for the shape.
Step three: Cut out what seems like a gazillion scallops.
Step four: align the cut out scallops so they overlap and then pin them into place on a separate piece of the same fabric.
Step five: sew each layer onto the fabric. Make sure to sew each layer so that the layer on top will cover the thread line.
Step six: Cut the fabric out depending on the pillow size you want. Mine is 12 x 18.
Step seven: Cut out the fabric for the back part and then sew it into place. I overlap mine so that I have an easy way of taking out the pillow.
Here's some images to help.


Speaking of sewing. If you think you can't do it, you can. It's just a little practice. I've been doing it for a long time, so it's a breeze for me, but I am dealing with an antique of a sewing machine. Seriously, I'll have to take pictures. It's ancient and it weighs a ton! I think a new sewing machine may be in the horizon (hint for hubby: just because you love me gift??).

1 comment:
Nancy, you are amazing! I am very impressed with all of your thriftiness and craftiness!
Post a Comment